Creating projects
To do anything useful in Cantiga, you need a project. Projects can be created by administrators in the Admin workspace.
Create the first project
To open the project management panel, perform the following actions:
- click on the workspace selector,
- select Admin workspace,
- in the workspace menu, expand Projects section and click on the Projects link.
Initially, the list of the projects is empty. Click on the Insert button below the list to open the project creation form:
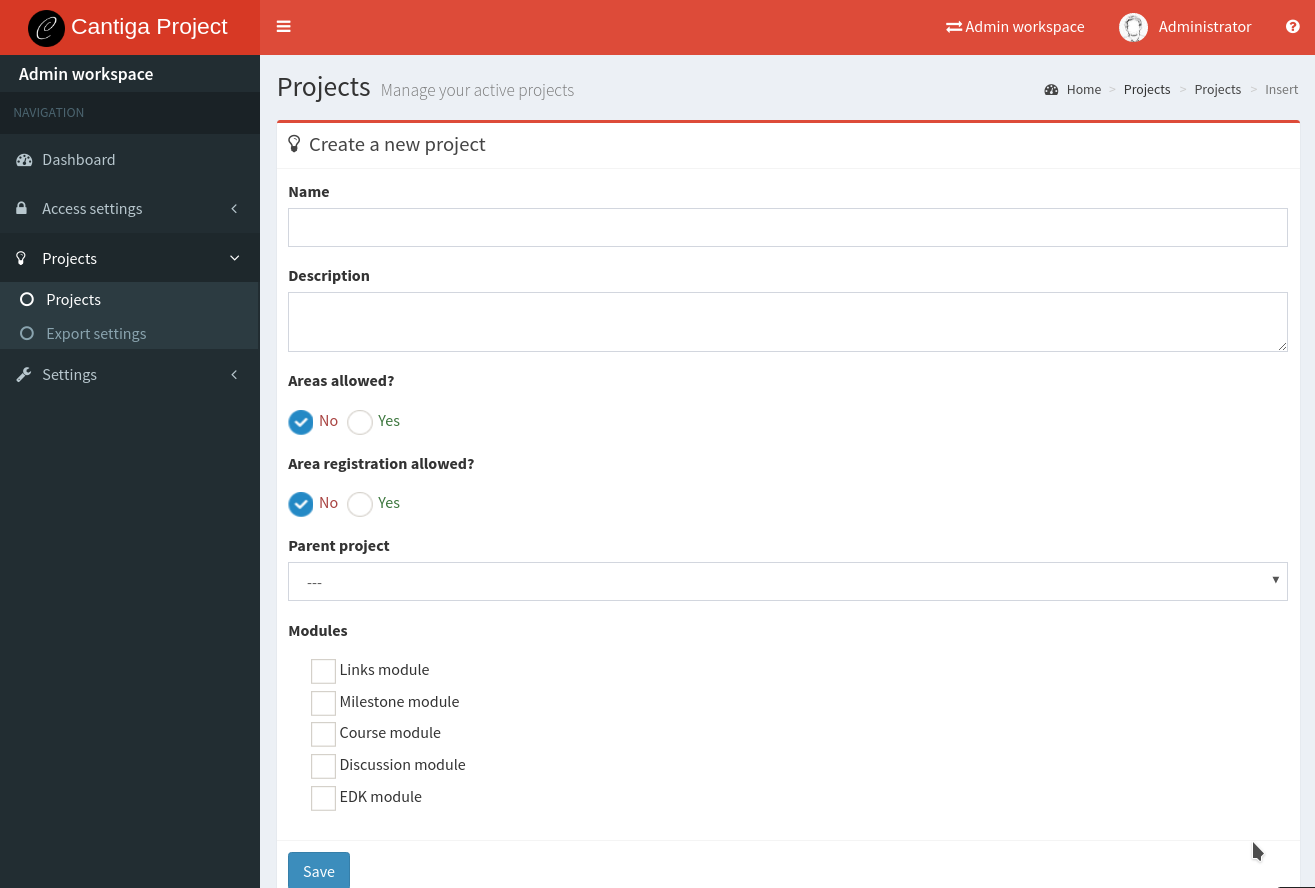
Explanation of the options:
- Name - name of the project. Try to keep it short (e.g. by using abbreviations), because it appears in some places with very little space,
- Description - longer description of the project,
- Areas allowed? - set to Yes to enable the support for areas in this project,
- Area registration allowed? - set to Yes to allow anyone with an account to request creating an area in this project. Otherwise, areas must be created manually by project managers,
- Parent project - currently, this list will be empty. It allows importing certain settings from an older, archived project.
- Modules - select the modules available in this project. Modules provide access to certain functionality and services.
Click on Save to finish the project creation.
Add project manager
Your project is now created and ready to use, however, it has no members. You must invite at least the project manager to the project. To do this, open the project details, and click Members button. You will see a page with the empty list of members and the Invite button. Click on it and fill in the invitation form.
To read more about inviting people to places, see Inviting people.
Note: each project must have at least one manager. Otherwise, it won’t be possible to modify project settings, and create certain objects, such as milestones, discussion channels and courses.
Review project settings
After accepting the invitation, you will see that the workspace selector contains a new option, and the user dashboard shows you the direct link to the workspace of the newly created project. When you enter the project workspace, the color of the top bar changes to blue. Take some time to look around. The Manage section contains the panels available only for the project managers. One of the links, Settings allows you customizing the behavior of the modules enabled for the project.
Some of the important settings are:
- Area form - the structure of the area profile can be customized. By default, Cantiga offers two basic types of area forms, and you can create your own form, too. Information about customizing the area forms can be found in Customizing area requests and areas.
- Area request form - the structure of the area request can be customized. By default, Cantiga offers two basic types of area request forms, and you can create your own form, too. Information about customizing the area forms can be found in Customizing area requests and areas.
To invite more people to the project, go to Project members page.